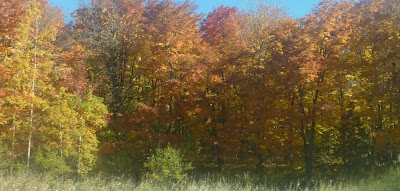
One of the level prototypes that I did this month was for a forest area. This is a crucial point in the story and I wanted this area to be distinct from the forests you see in the OC or other mods. So, I thought, let's make it an autumn forest. With all the fall color variations, one can go really wild and the effect should be a totally different visual experience!
 |
| I love autumn! |
So, I started exploring the SpeedTreeCAD.exe which the Toolset wiki claims can be used to customize the huge number of parameters a tree has, which it can do. Unfortunately, in the limited time I've spent fiddling with it, replacing textures seems a tad difficult. You can select your own diffuse map but for some reason, the individual leaf/frond textures don't update. So, I went about it in another way and the result is another tutorial - Recoloring Trees!
Tools you will need -
- SpeedTreeCAD.exe (strictly not necessary - XVI should suffice)
- A hex-editor (I use XVI32)
- An image-editing program (Gimp or Photoshop)
Before we go on, there are a few important points to note about the SpeedTree files. A tree is made up of different components - a
bark texture, one or more
leaf textures, one or more
frond textures and an overall
diffuse map containing the leaf and frond textures. In the below workflow, we will be modifying only the leaf and frond textures and frankly, that should be enough to present a different type of tree. Anyway, on to the workflow!
## Export from speedtreetools.erf
Open up
speedtreetools.erf present in the packages/core/data_tools folder under the Dragon Age installation directory and extract all the resources to a folder of your choice. We will be using this as a reference.
Copy the
.spt and
.dds file for the tree you need to modify.
Examples for this workflow - a bush (bsh_c_boxwd) and a tree (tre_f_oaksmall)
You can copy the .tga files and edit them individually too - entirely up to your preferences. I will be generating them from the .dds file.
## Image Editing
- Open up the diffuse map in the image editing program. I will use Gimp as a reference for this tutorial. When asked to load mipmaps, select Yes.
- A simple way to adjust color is to go to Colors -> Components -> Channel Mixer and play around with the settings. Once you've settled on your choice of color, save the file to a different folder. The name should follow the following convention:
[3-character tree type]_[1 character]_[anything]_diffuse.DDS Make sure the character length is constant Example: bsh_t_boxwd_diffuse.DDS or tre_t_oaksmall_diffuse.DDS
 |
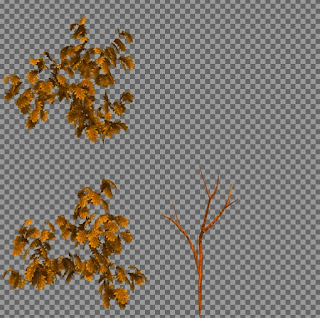
| After editing the colors in Gimp - the left 2 are leaves and the one in the right bottom is the frond |
- The next step is to generate the TGAs. We will resize the canvas to the appropriate TGA dimensions and save them.
Bush DDS files are 512 x 512 and TGAs are 256 x 256 Tree DDS files are 1024 x 1024 and TGAs are 512 x 512
- Go to Image -> Canvas Size and change the size to either 256x256 or 512x512 depending on which tree type you are editing.
- Adjust the canvas setting - in Gimp this can be done by simply moving the image around so that the desired area is within the bold box in the Preview Pane. The objective is to do 3 exports - 2 for the individual leaves and 1 for the frond.
- Export these as TGAs and save them in the same folder as the modified DDS. File name doesn't matter for now.
## Open the .spt file in XVI32
- Search for diffuse (case-insensitive - some files have caps). There will typically be 2 entries for the diffuse DDS map. Change the file name referenced to the name you've saved your DDS file as.
- Search for tga (case-insensitive). There will be at least 3 references:
BK_ - leave this as it is (unless you've modified the bark texture too) LV_ - note down the file name(s) FR_ - note down the file name(s)
- Go to your modified TGAs and name them in a similar format but change something to identify it as yours.
Example: Boxwood bush: LV_t_boxwood1.tga, LV_t_boxwood2.tga, FR_t_boxwood.tga Oaksmall tree: lv_t_oak_1.tga, lv_t_oak_2.tga, fr_t_oak.tga As you can see, there is no naming convention for these. So, you have to open the .spt in a hex-editor to find out these names. An alternative is to open the .spt in SpeedTreeCAD.exe and note down the names from Global (Diffuse name), Leaf (leaf names) and Frond (frond names) tabs.
- Go back to the hex-editor and replace the names present with your names (make sure length is constant!)
- Once the changes are done, save the .spt with another name. This should follow the same conventions as the diffuse DDS file
[3-character tree type]_[1 character]_[anything].spt The name length doesn't matter here
## DA Toolset
Copy the modified TGA, DDS and SPT files to the core/override folder you use - I do level-building from the Single Player module so these have to go under packages/core/override while building. Once the level layouts are done and moved to your module's core/override folder, you can move these files there.
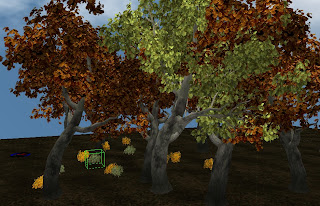
Open up DA Toolset and insert a new Tree Controller. If you've done everything correctly, you should be able to see and place the new trees in your level.
 |
| Toolset shot |
|
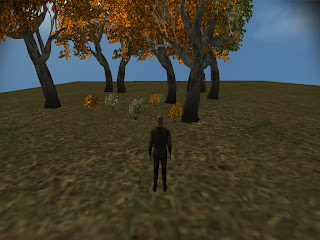
Do the regular export process and you should be able to see it in-game without issues -
 |
| In-game shot |
If you see blocky leaves in-game, then, it is possible that you've messed up the TGA editing.
One obvious thing to note here is that you do not want to replace the textures in the existing speedtree files -> not unless you want those modified trees in all your levels where that tree is placed.
Well, that was a long one to write and format. If you have any questions, post them here or better, in the
BSN Custom Content Forum thread
Read More...


